How to grant permissions in KSeF?
Learn how to allow RAVAPI SERVICE to issue invoices on your behalf via the KSeF system.
Prepare for the changes – see what you need to do to ensure everything works smoothly with RAVAPI SERVICE from April 2026.
STEP 1) Log in to the KSeF system using a Trusted Profile or a qualified certificate.
STEP 2) Find the permissions section and allow RAVAPI SERVICE company to create and view your invoices.
STEP 3) In the same place, grant RAVAPI SERVICE company permission for self-billing on your behalf.
A detailed description of each step with screenshots can be found below.
1) How to log in to the KSeF permissions system
Important! You can log in to the MCU Module in two ways:
Via Trusted Profile (as shown in this guide) – if you run a business as an individual or are a company representative with authorization granted via the ZAW-FA form.
Via qualified certificate (a qualified seal with the company NIP is required) – if you represent a company.
To allow RAVAPI SERVICE company to issue invoices on your behalf, you first need to log in to a dedicated module in the KSeF system (called the MCU Module).
More details about this module can be found here: https://ksef.podatki.gov.pl/media/0iafuqe5/podrecznik-uzytkownika-modulu-certyfikatow-i-uprawnien-mcu.pdf
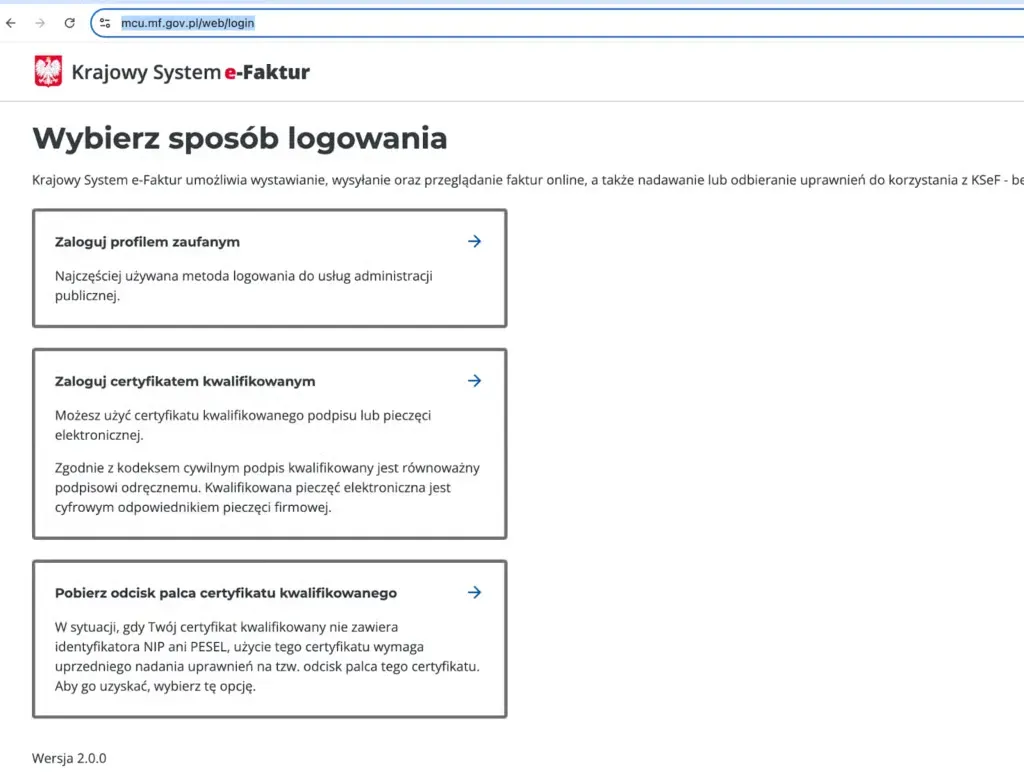
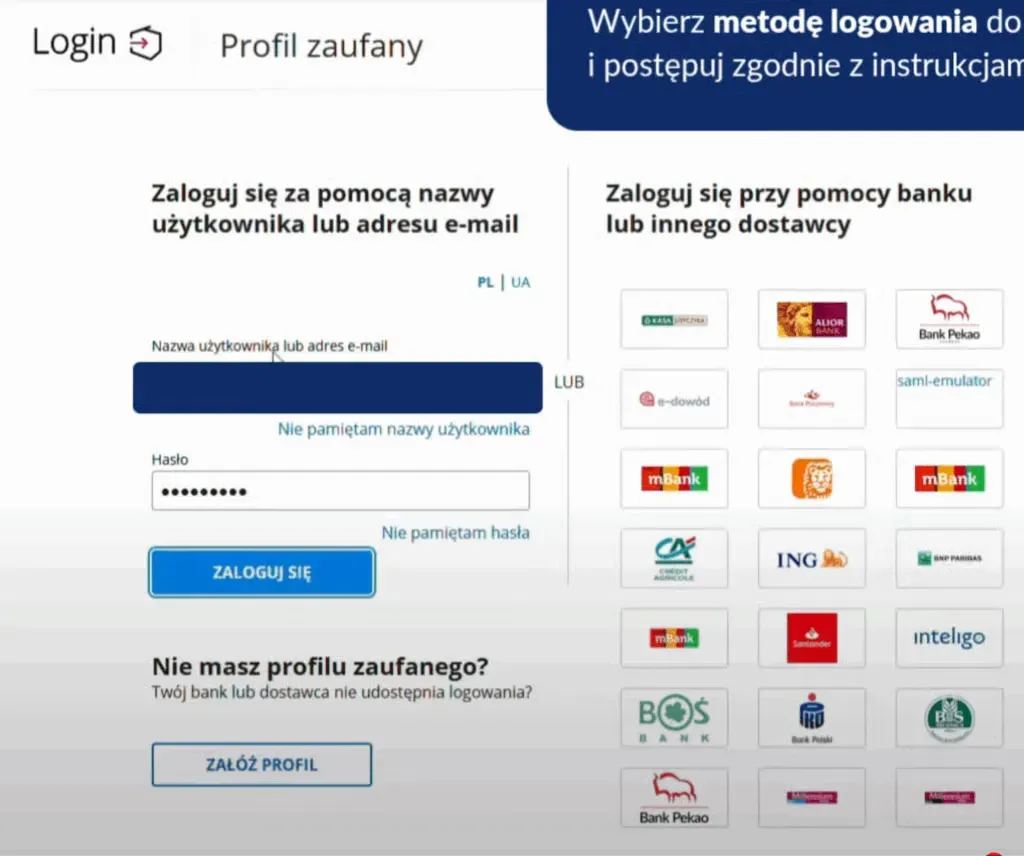
Open https://mcu.mf.gov.pl/web/login and click "Log in with Trusted Profile".
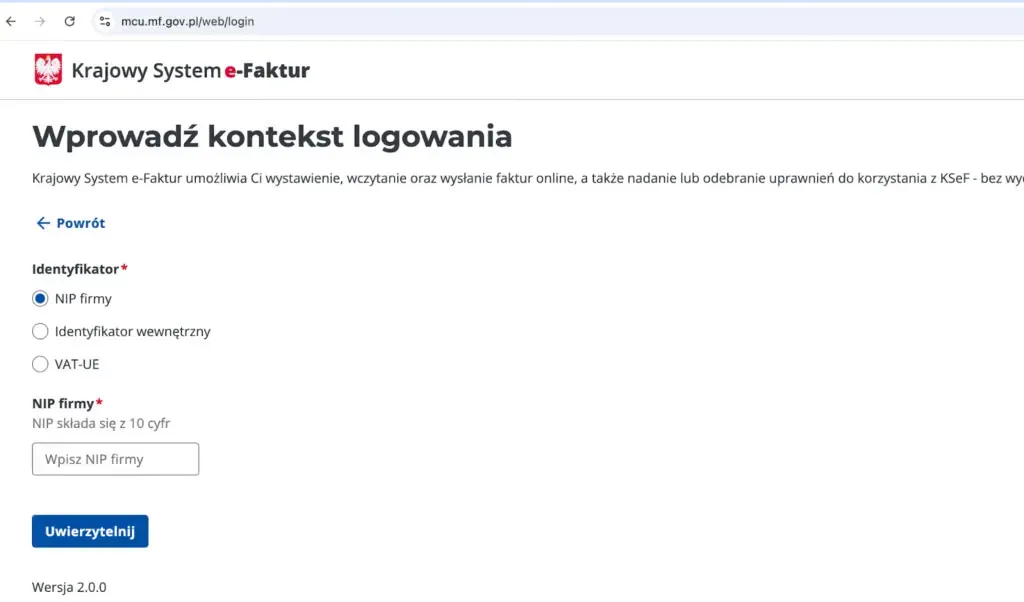
In the "Identifier" field select "Company NIP", enter your company’s NIP number and click "Authenticate".
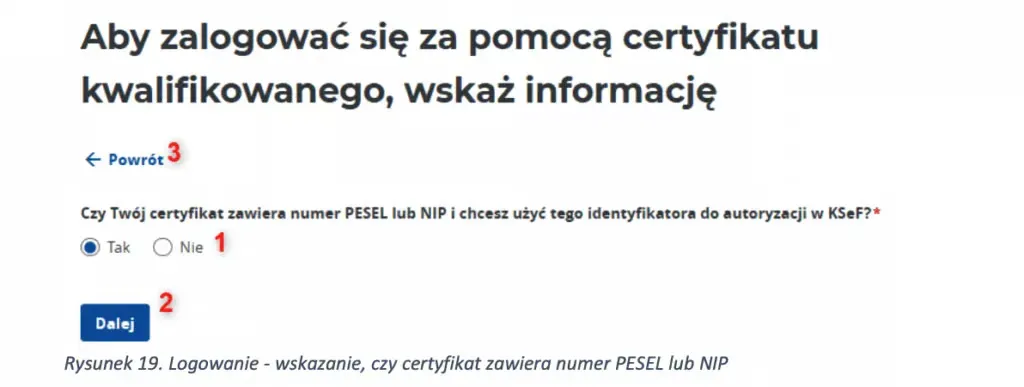
In the next window click "Yes", then "Next". * Some screenshots include numbers from the official KSeF guide available here. You can ignore them.
Now click "Sign". You will be redirected – then select "Trusted Profile".

Confirm the selection "Trusted Profile" again.
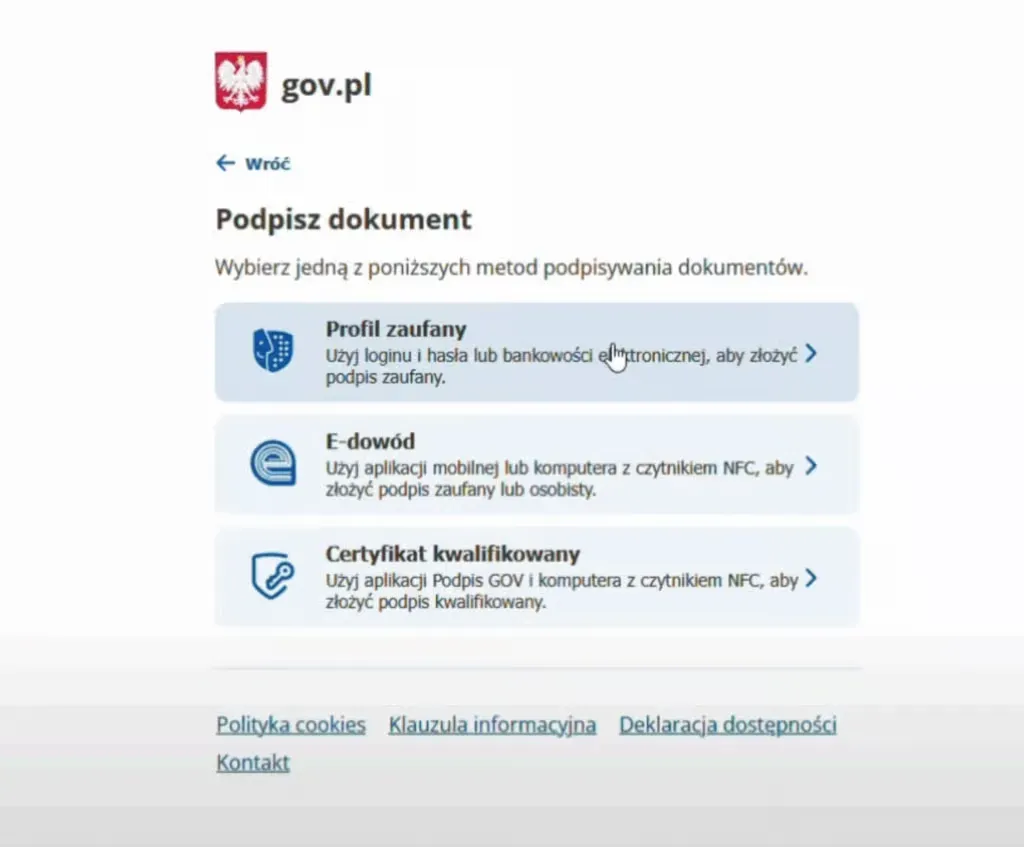
Choose how you want to log in to the Trusted Profile and confirm signing the document.
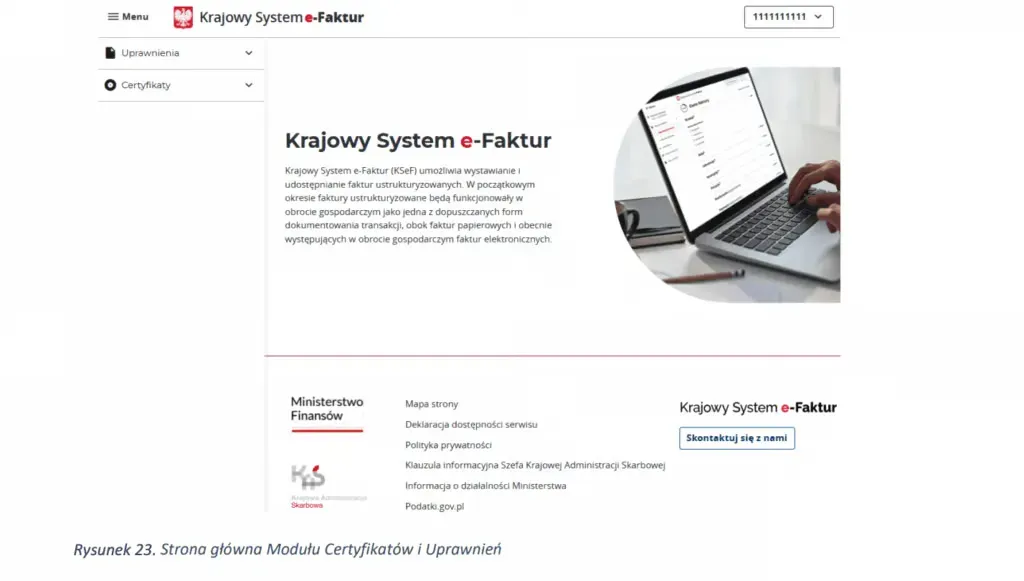
If everything went well, you will now see the main page of the MCU Module.
2) How to allow RAVAPI SERVICE to issue invoices on your behalf (for RAVAPI SERVICE Partners)
Log in to the MCU Module following the instructions in the previous section "How to log in to the KSeF permissions system".
A video showing how to log in to KSeF using the Trusted Profile can be found here: https://www.youtube.com/watch?v=V6E1fGUFPw4.
More information and instructional videos about other login methods are available at: https://ksef.podatki.gov.pl/modul-certyfikatow-i-uprawnien-mcu/
Companies covered by mandatory KSeF must grant special permission for other entities (in this case RAVAPI SERVICE) to issue invoices on their behalf. Below we show step by step how to do it.
Remember: Every correctly granted permission in the MCU module should automatically appear in RAVAPI SERVICE systems as well. At the beginning, it is worth regularly checking whether permissions have been properly granted and are visible on both sides.
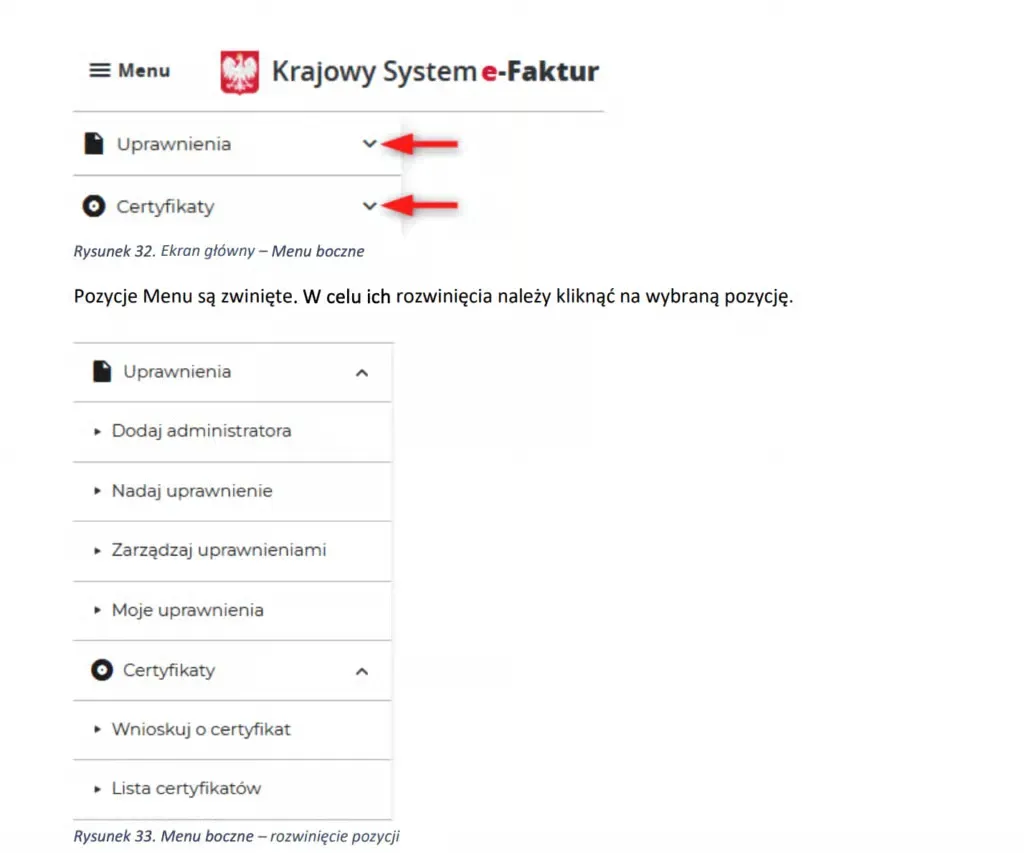
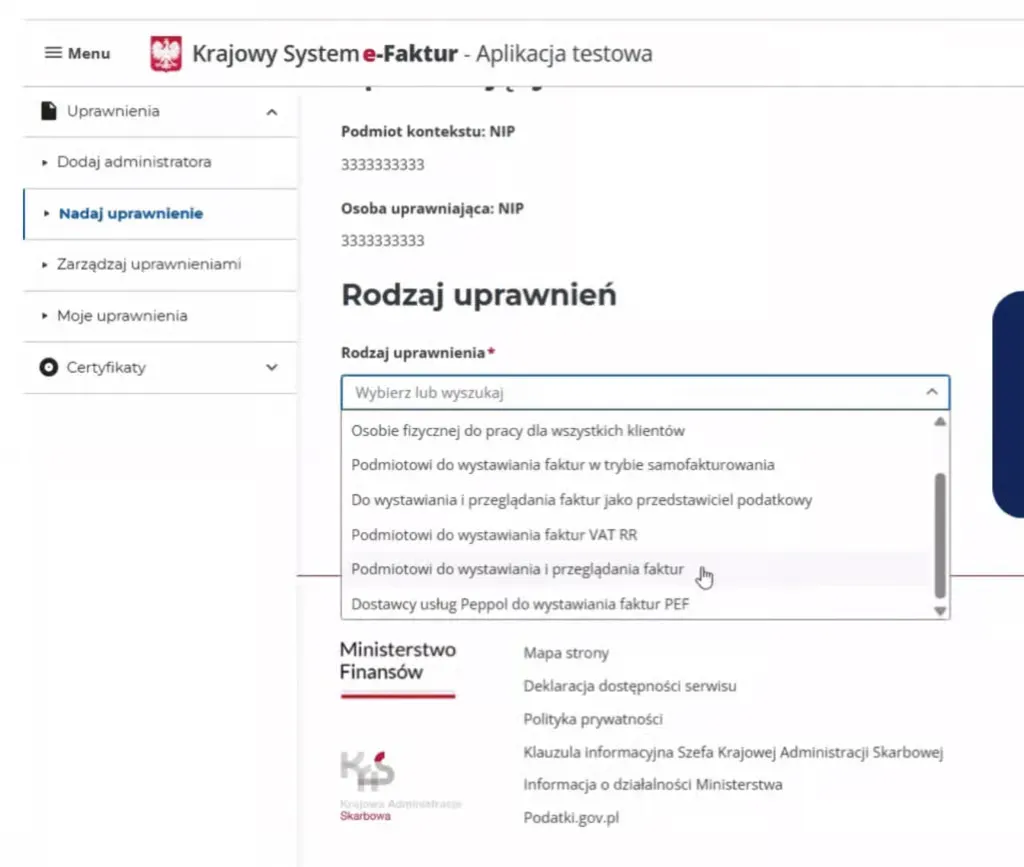
After logging in to the MCU Module, in the "Permissions" menu select the "Grant permissions" tab.
You will see a new screen – select the permission type "Entity for issuing and viewing invoices".

Enter the NIP of the selected RAVAPI SERVICE company and its full name. In the "Scope of permissions" section, select the appropriate options depending on whether the company should be able to "issue invoices" only or also "view invoices".
If necessary, you can also allow RAVAPI SERVICE to delegate these permissions further to other entities.

To save changes, click "Grant permissions".

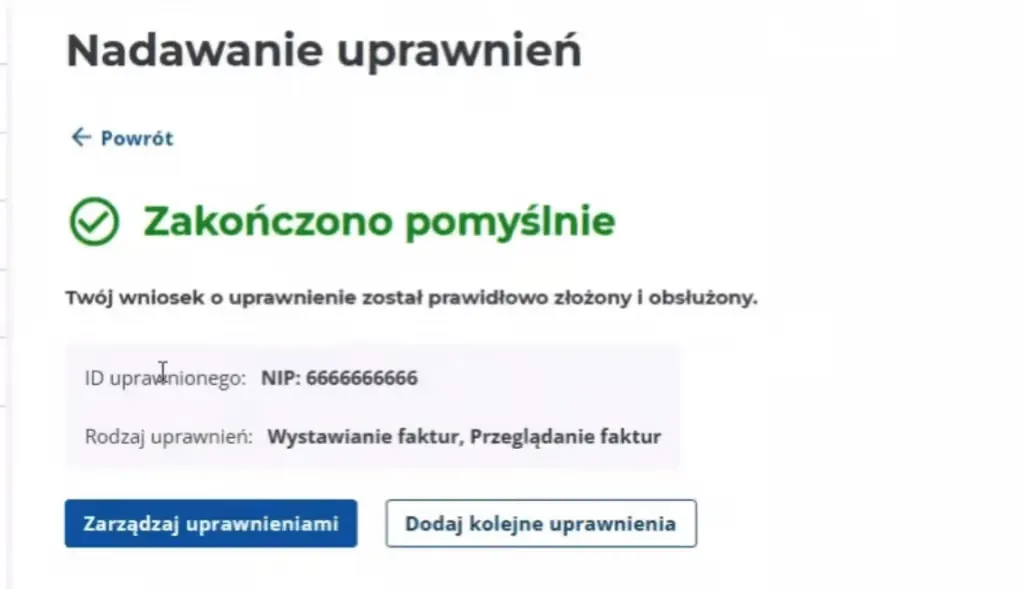
The status of your request should now show "in progress".
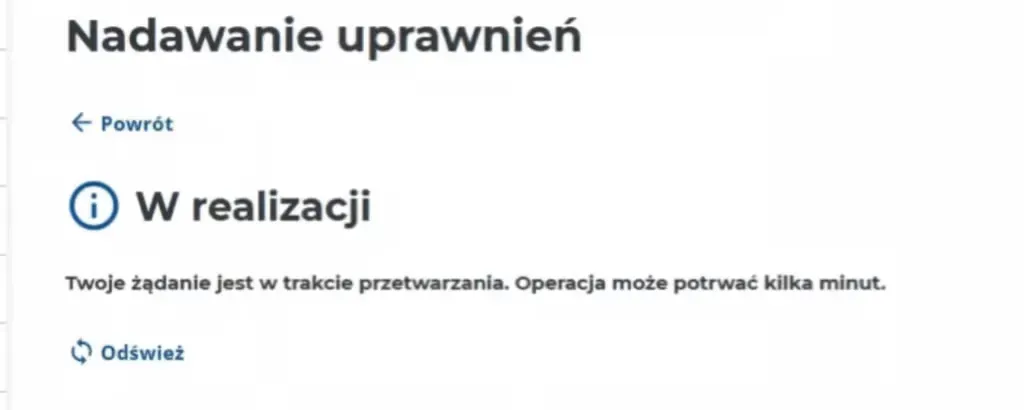
Once the system processes your request, you will see a confirmation message indicating that the permissions were successfully granted.
Tip! A video showing the entire permission granting process can be found at: https://youtu.be/E4mQ3oRkDk0?t=122.
3) How to allow self-billing (for Service Providers cooperating with RAVAPI SERVICE)
To grant the right to self-billing, you must first log in to the MCU Module – see the instructions in the section "How to log in to the KSeF permissions system".
Once on the main screen of the MCU Module, in the "Permissions" section click "Grant permissions".
On the next page, in the "Permission type" field select "Entity for issuing invoices in self-billing mode".
Perform the remaining steps exactly as described in the section "How to allow RAVAPI SERVICE to issue invoices on your behalf (for RAVAPI SERVICE Partners)".
Tip! An instructional video showing how to grant permissions is available here: https://youtu.be/E4mQ3oRkDk0.
Important information: This document is for informational purposes only and does not constitute legal or tax advice. If you need assistance tailored to your specific situation, contact an experienced advisor.